S P E C I F I C A T I O N S
For the
Repair and improvement
Of a
2 manual 10 rank pipe organ
at
First Congregational – United Church of Christ
Wadena, MN
Scroll down for
pictures.
1. Remove all pipework from the organ and store in protective trays at the church.
2. Dissassemble organ far enough that the damaged plaster walls behind the organ can be repaired.
3. Transport the windchests to the Moe Piano & Organ Company shop for the installation of new electric chest action.
4. Transport the organ console to the Moe Piano & Organ Company shop for the following repairs and upgrades.
a. Install new solid-state electronic coupler and MIDI system.
i. MIDI system includes a Viscount RD-80e sequencer/sound module with amplifier and speaker.
b. Install new sliver key contacts on the Swell and Great manuals and the pedal board.
c. Install new stop rail with new engraved stop tabs and actions to accommodate the new stoplist.
d. Install new solid-state electronic combination memory system as follows:
i. New keyslips with new pistons.
ii. 4 pistons affecting the Swell stops
1. Swell Cancel
iii. 4 pistons affecting the Great stops
1. Great Cancel
iv. 4 toe studs affecting the Pedal stops
v. 8 general pistons affecting all the stops (5-8 duplicated by toestud)
1. General cancel
vi. Setter piston
vii. Great to Pedal Reversible piston and toe stud
viii. Programmable Sforzando piston and toe stud
ix. Programmable Crescendo sequence
x. 32 levels of memory protected by password
e. Repair broken key on Great manual
f. Install new 12 position transposer
g. Install new MIDI sustain toestud
h. Install new digital control panel for MIDI, memory, and transposer functions.
5. Transport the existing façade pipes to the Moe Piano & Organ Company shop to be repaired and refinished.
6. Deliver restored console, façade pipes, and windchests and install along with the following:
a. New solid-state electronic relay system
b. Up to 50 feet of new main cable between the console and the chamber
7. Clean the organ chambers.
8. Clean all pipework repairing as needed and re-install in organ.
9. Install new electric swell shade operator and necessary linkages.
10. Tonal finish all pipework and tune.
Analysis of Pipes
8’ Open Diapason – 85 pipes
8’ Dulciana – 73 pipes
8’ Melodia – 73 pipes
8’ Viole d’Orchestra – 73 pipes
8’ Violin Diapason – 73 pipes
16’ Stopped Diapason – 97 pipes
8’ Voix Celeste TC – 49 pipes
8’ Oboe – 73 pipes
16’ Bourdon/Lieblich – 32 pipes
Chimes – 25 notes
New stoplist
Great Organ
8’ Open Diapason
8’ Melodia
8’ Viole d’Orchestra (sw)
8’ Voix Celeste TC (sw)
8’ Dulciana
4’ Octave
4’ Flute
2 2/3’ Twelfth
2’ Super Octave
III Mixture (syn)
8’ Oboe
Chimes
Great to Great 4’
Swell to Great 16’
Swell to Great 8’
Swell to Great 4’
Automatic Pedal
MIDI A
MIDI B
Swell Organ
16’ Lieblich Gedeckt
8’ Violin Diapason
8’ Stopped Diapason
8’ Viole
8’ Voix Celeste TC
4’ Principal
4’ Flute D’Amour
4’ Dulcet
2 2/3’ Nazard
2’ Flautino
1 1/3’ Larigot
8’ Oboe
4’ Oboe Clarion
Swell to Swell 16’
Swell Unison Off
Swell to Swell 4’
MIDI A
MIDI B
Tremolo
Pedal Organ
16’ Bourdon
16’ Lieblich Gedeckt
8’ Octave Bass
8’ Bass Flute
8’ Flauto Dolce
8’ Cello
4’ Choral Bass
8’ Oboe
Great to Pedal 8’
Great to Pedal 4’
Swell to Pedal 8’
Swell to Pedal 4’
MIDI A
MIDI B
Pictures
More pictures will be added as work progresses. Be sure to check back often.
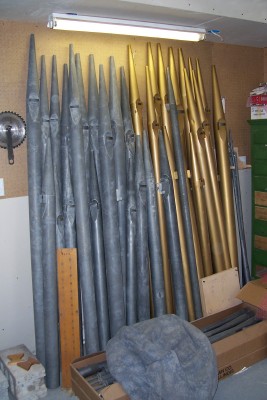
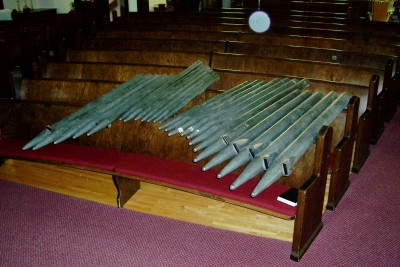
The façade pipes. The pipes on the left have
been sandblasted in preparation for
refinishing. The pipes on the right still
have their original gold paint. These pipes
will also be repaired and any dents will
be filled in.
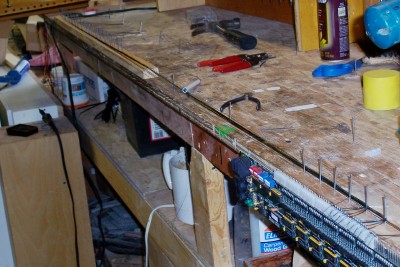
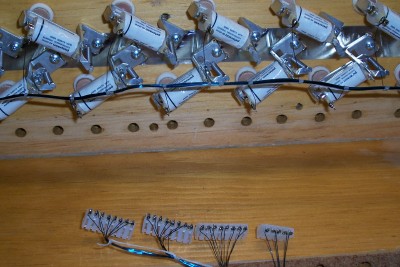
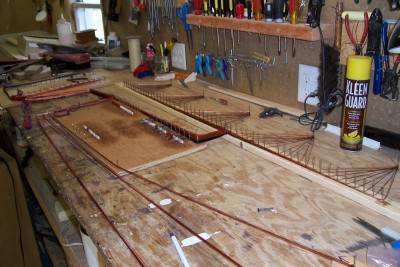
A new chest cable part way through construction. Nylon coated
wire is used to for to keep the cable size small and the make
soldering and assembly much easier. The wire does not need to
be stripped prior to soldering as the nylon coating simply melts off.
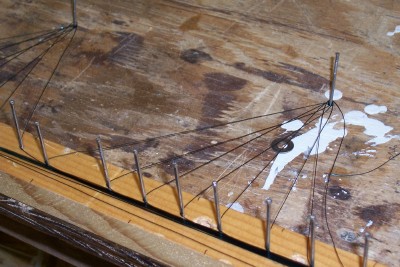
A close up view of the nylon coated wire.
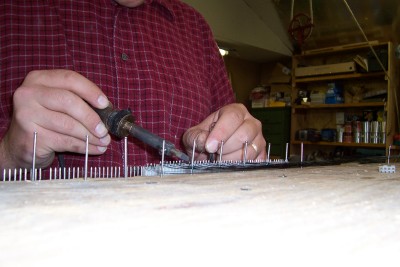
Nylon coated wire being soldered onto the connectors for the
solid state driver circuit board.
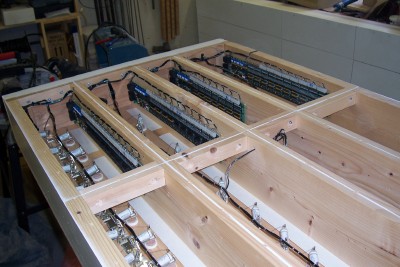
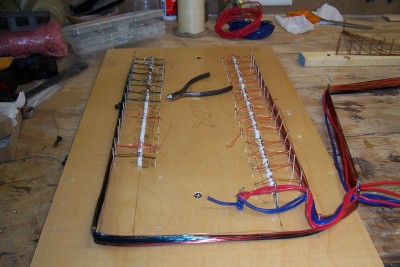
Interior view of one of the windchests of the organ with the
new chest cable installed. The white devices at the top of the
photo are the electro-magnetic valves which control the flow
of air to the pipes. At the bottom of the picture are four of the
plugs that connect the wiring to the solid state driver circuit board.
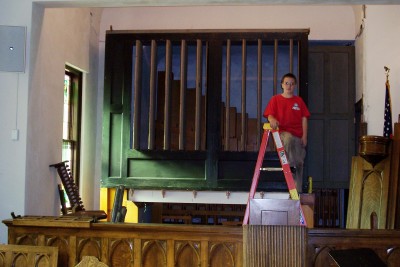
This is my trusty assistant Alex. He is 2 ½ and has a good time
helping his dad J
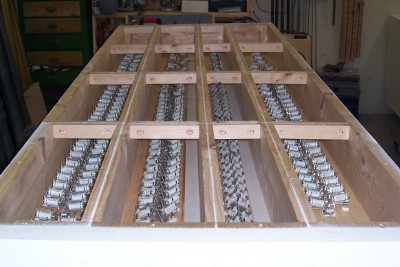
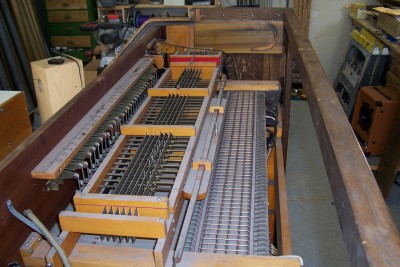
Here is one of the two main windchests in this organ prior to
wiring. The chest shell is new contruction and the boards to
which the electro-magnetic valves are attached are original to
the organ. New chest shells were required for this organ in order
to make room for the new electro-magnetic valves which replace
a deteriorated electro-pneumatic chest action.
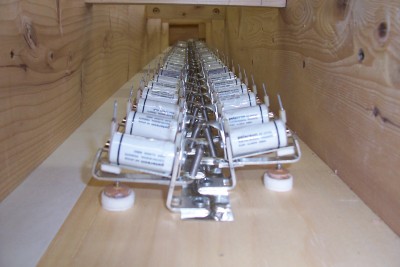
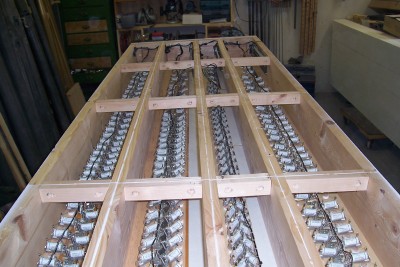
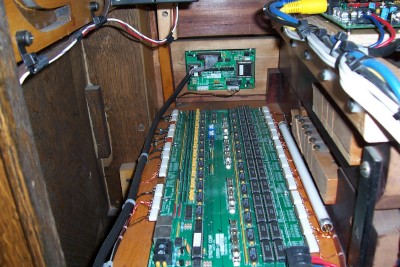
This is an “ant’s eye view” of one rank or valves looking down
the length of the windchest.
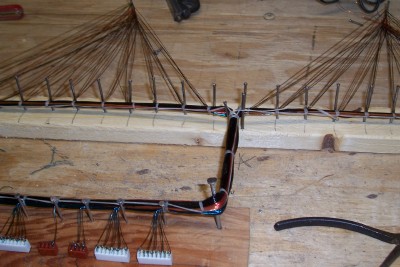
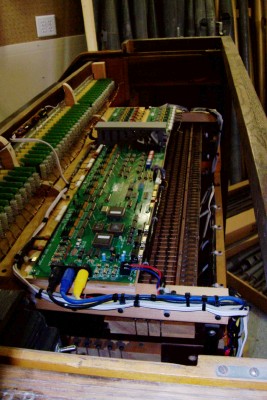
Here is the same windchest after being wired. All the wiring
and the solid state driver circuit boards are contained within the
windchest. This eliminates the need for a bulky cable running
through the organ chamber. The only connection to the windchest
is made with a CAT5 ethernet cable like you might connect to
computer.
Here are the solid state driver circuit boards installed in the
windchest. They utilize transistors and other solid state
electronic components to interpret the signals from the organ
console and open the appropriate valves.
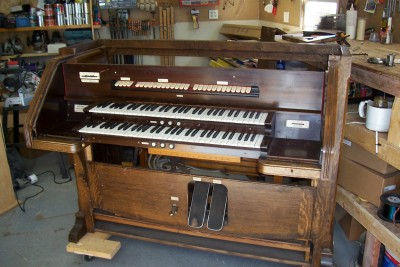
Here is the existing console prior to disassembly. The organ was
built in 1924 by the M. P. Moller company of Hagerstown, MD.

Back view of the console prior to disassembly.
View behind the existing stop tabs.
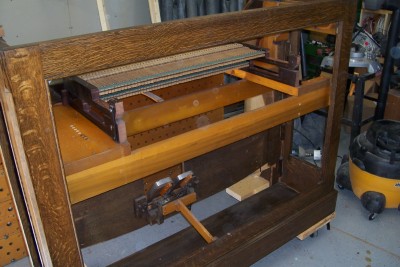
Back view of the console after all the old components have
been removed.
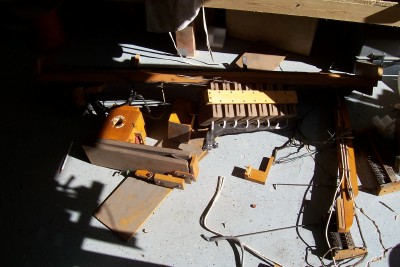
The old guts from the console waiting for the scrap heap.
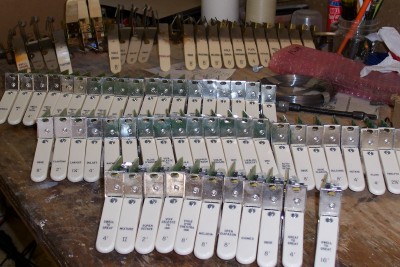
The new stop tabs waiting to be installed in the console. The
old stop tabs are in the background.
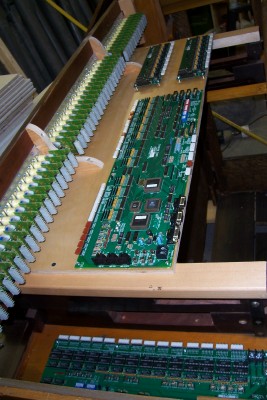
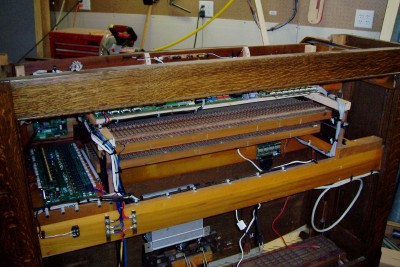
New tablet board, stop actions, and circuit
boards installed in console and awaiting
wiring.
Main console wiring harness all run and waiting to be laced.
Close up view of part of the main console harness. This part of
the harness connects to the combination action circuit board and
operates the stops tabs and thumb pistons.
Close up view of part of the main console cable after being laced up.

Front of console after installing new equipment. The brass panel
on the lower right is for controlling the various features of the new
electrical system.
Rear view of console showing wiring and circuit boards. AC cords
at the bottom of the picture are awaiting an outlet to be plugged into.
This is the area directly behind the new stop tabs.
The new stop actions to which the tabs are
attached are in a line on the left.
View behind the control panel. The square circuit board at top center
is the back of the control panel. The large circuit board at bottom center
is the new combination memory system.
Re-installation is
begun!
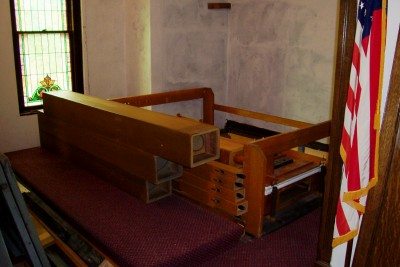
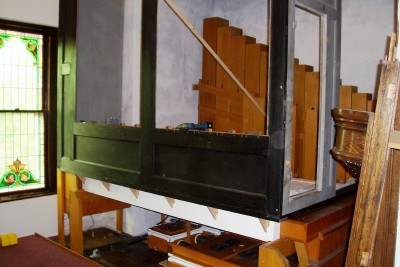
This is the organ chamber in the church. Shown are the legs and
regulators for the organ.

Another view of the organ chamber area showing the main and
pedal regulators.
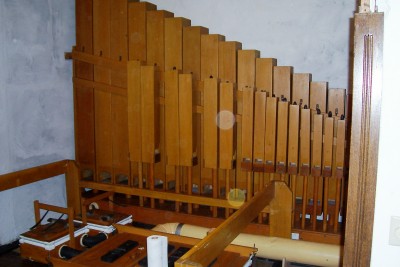
16’ Bourdon pipes awaiting installation.
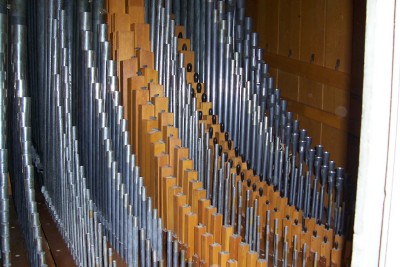
Zinc basses of the Diapason, Viole, Dulciana, and Violin Diapason
awaiting installation.

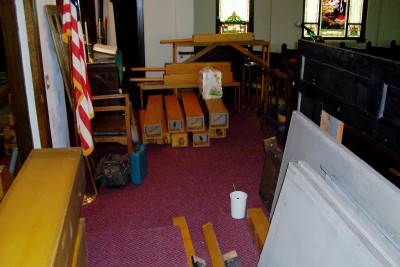
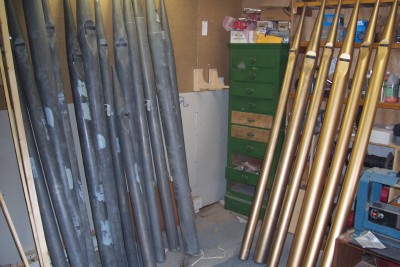
This is the storage room at the church where the pipes and casework
of the organ were stored while the organ was being restored.
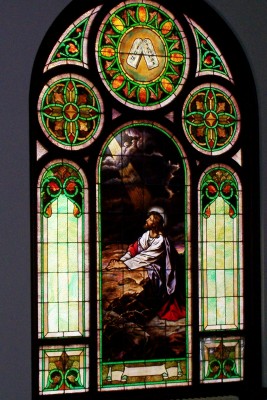
One of three beautiful stained glass windows
in the sanctuary of this church.
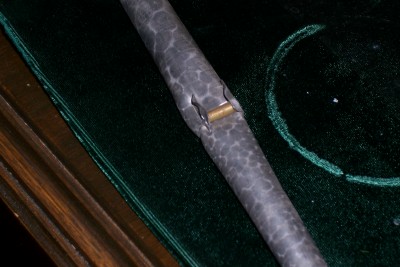
Damaged pipe. Damage caused be HVAC installers.
16’ Bourdon pipes installed on the rebuilt winchest.

Main winchests installed in organ chamber. The original topboards
(brown in the picture) were retained and installed on new chest
shells (white) with new electric action.

Andrew installing casework supports on new windchests.
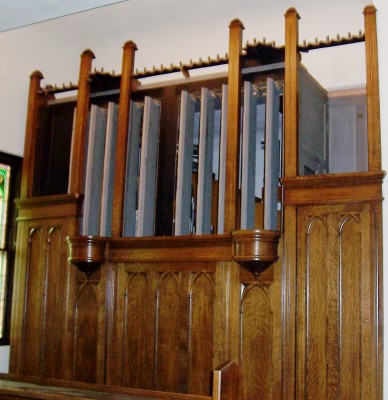
Swell shade frames and casework installed on new windchest.
Swell shades and remaining casework installed. Organ is now fully
enclosed and awaiting pipes.
This is a view into the organ chamber after the pipes have been
installed.
The casework is back, now for the façade pipes.
Here are the façade pipes in 3 stages of repair. The pipes on the left
have been sandblasted and the dents have been filled. The 3 pipes on
the right have been painted with 2 coats of gold metallic paint and 1 coat
of clear laquer. The three pipes to the left of the 3 completed pipes
have only one coat of gold on them.
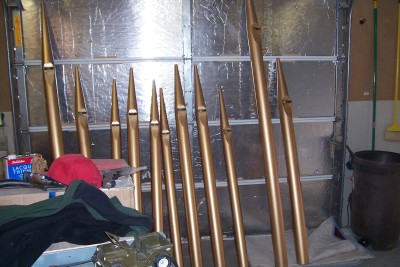
Here are some more completed pipes ready to go back in the organ.
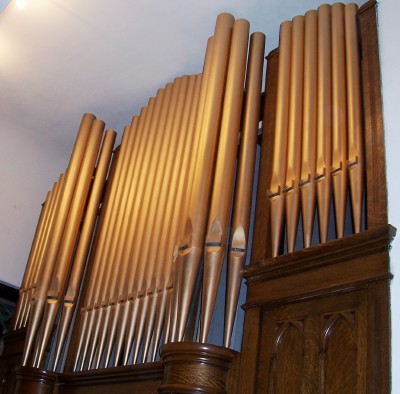
Organ completely installed with newly restored façade pipes in place.
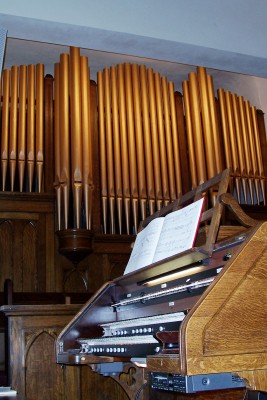
Another view of the organ from the console.
All work
complete!!